Nikon FG User Manual: A Comprehensive Guide
Discover the Nikon FG’s capabilities with this detailed guide, covering operation, features, and maintenance. Access PDF manuals and learn about emissions testing exemptions.
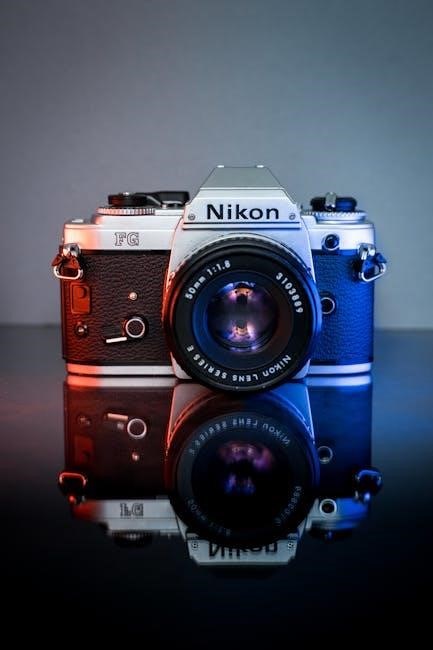
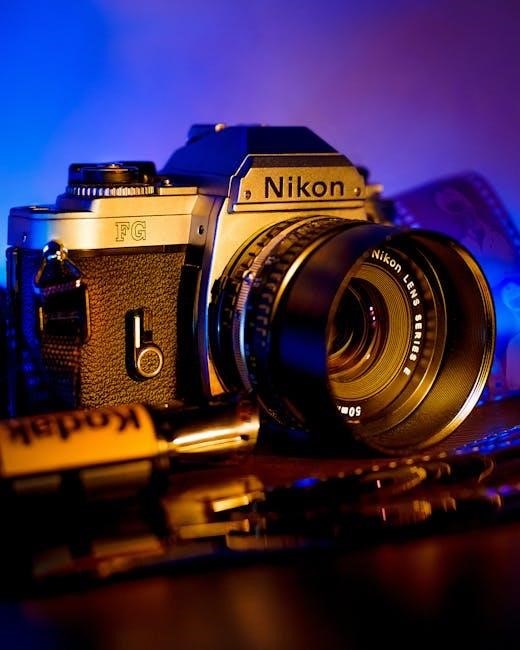
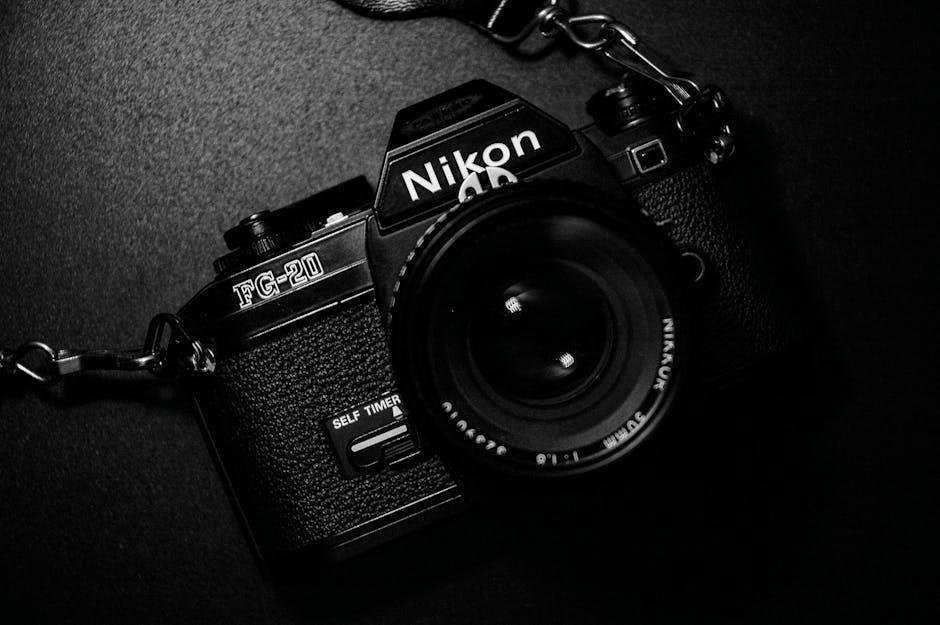
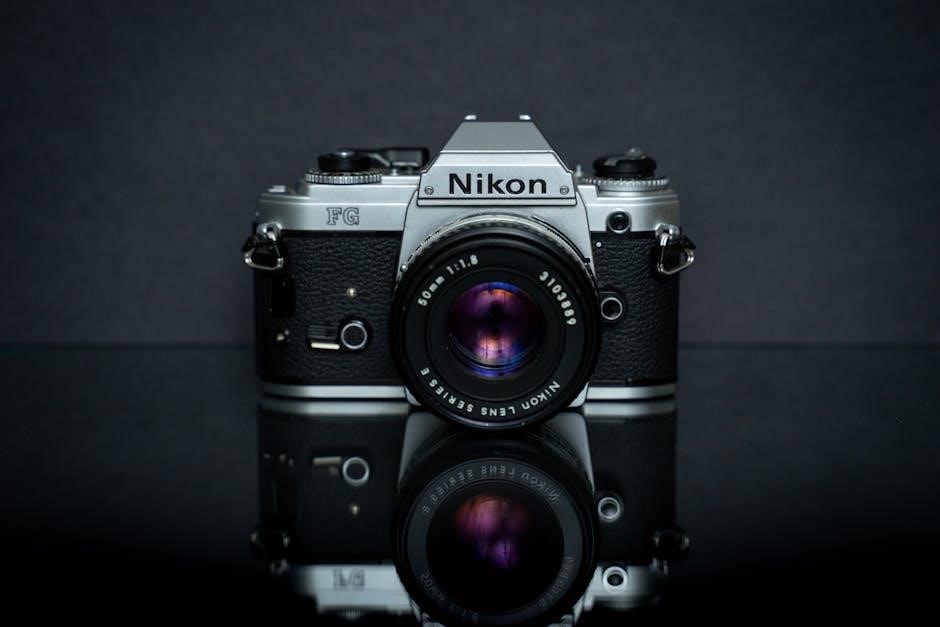
The Nikon FG, released in 1982, represents a pivotal point in Nikon’s history, bridging the gap between fully mechanical SLRs and more technologically advanced models. This 35mm film camera quickly gained popularity due to its compact size, lightweight design, and impressive feature set, offering both amateur and experienced photographers a versatile tool.
It’s a camera that balances automation with manual control, providing Programmed Auto exposure alongside Aperture-Priority, Shutter-Priority, and full Manual modes. Understanding these modes is key to unlocking the FG’s potential. Resources like service and repair manuals, available online, can aid in maintaining this classic camera.
This guide aims to provide a comprehensive overview of the Nikon FG, from its basic operation to its more advanced features, ensuring you can confidently capture stunning images with this iconic camera. It’s a gateway to exploring film photography!
Understanding the Nikon FG’s Key Features
The Nikon FG boasts a robust electronic shutter, offering speeds from 1 to 1/1000th of a second, alongside bulb mode for long exposures. Its electronically controlled aperture-priority and shutter-priority modes provide creative flexibility, while the Program mode simplifies shooting for beginners. A key feature is its compatibility with a wide range of Nikon F-mount lenses.
The camera’s built-in DX-coding system automatically detects the film speed, though manual override is available. Its TTL (Through-The-Lens) metering system ensures accurate exposures, and the viewfinder provides essential shooting information. Accessing a detailed manual is crucial for mastering these features.
Furthermore, the FG includes a self-timer and multiple exposure capability, expanding creative possibilities. Understanding these features, alongside emissions testing requirements for vehicles, allows for a well-rounded photographic experience.
Camera Controls and Operation
Master the Nikon FG’s controls – power, film speed, and exposure modes – for optimal performance. Refer to the manual for detailed guidance.
Powering On and Off the Nikon FG
The Nikon FG operates on two AAA batteries, inserted into the camera’s grip. To power on, simply advance the film advance lever; the camera awakens automatically when film is loaded and the lever is moved. The camera’s electronic functions, including the light meter and shutter speed display, become active upon powering on.
Turning off the Nikon FG is equally straightforward; The camera doesn’t have a dedicated ‘off’ switch. Instead, it enters a sleep mode after a period of inactivity, conserving battery life. Removing the batteries will, of course, completely power down the camera, but this isn’t necessary for typical use. Ensure batteries are fresh for reliable operation, especially when utilizing the electronic features. Refer to the complete user manual for detailed battery information and troubleshooting tips regarding power issues.
Setting the Film Speed (ISO)
Accurately setting the film speed (ISO) on your Nikon FG is crucial for proper exposure. The FG features a film speed dial located on the top plate, surrounding the shutter speed dial. This dial allows you to select ISO values ranging from 25 to 3200.
To set the ISO, lift the film speed dial slightly and rotate it until the desired ISO number aligns with the indicator mark. Ensure the dial clicks firmly into place. When using films with ISO values not directly indicated on the dial (like 400), select the nearest available value (e.g., 400). Remember to adjust the exposure compensation if needed. Consult the complete Nikon FG manual for detailed guidance on exposure compensation and understanding how ISO affects your images. Incorrect ISO settings will lead to under or overexposed photographs.
Understanding the Exposure Modes
The Nikon FG offers versatile exposure modes, granting photographers control over their images. These include Program (P), Aperture-Priority (A), Shutter-Priority (S), and Manual (M). Program Mode (P) automates both aperture and shutter speed for convenient shooting. Aperture-Priority (A) lets you select the aperture, while the camera determines the shutter speed.
Shutter-Priority (S) allows you to set the shutter speed, with the camera calculating the appropriate aperture. Manual Mode (M) provides full control over both settings. The Nikon FG manual details each mode’s functionality. Experimenting with these modes is key to mastering the camera. Note that the FG has two additional shooting modes besides Program: Auto and Manual, offering further creative options for photographers.
Program Mode (P) ― Automatic Exposure
Program Mode (P) on the Nikon FG offers a fully automatic shooting experience, simplifying photography for beginners and providing convenience for experienced users. In this mode, the camera intelligently selects both the optimal aperture and shutter speed based on the scene’s lighting conditions. This ensures well-exposed photographs without requiring manual adjustments.
The Nikon FG’s program mode prioritizes a balance between aperture and shutter speed, aiming for sharp, clear images in various situations. It’s an excellent choice for everyday snapshots and general photography where precise control isn’t essential. Refer to your Nikon FG user manual for detailed explanations and tips on maximizing this mode’s potential. It’s a great starting point for exploring the camera’s capabilities.
Aperture-Priority Mode (A), User Controls Aperture
Aperture-Priority Mode (A) on the Nikon FG grants you creative control over the depth of field, while the camera automatically sets the appropriate shutter speed for correct exposure. By selecting the desired aperture (f-stop), you dictate how much of the image will be in focus. A wider aperture (smaller f-number like f/2.8) creates a shallow depth of field, ideal for isolating subjects with blurred backgrounds.
Conversely, a narrower aperture (larger f-number like f/16) yields a greater depth of field, keeping more of the scene sharp – perfect for landscapes. The Nikon FG’s metering system ensures proper exposure based on your aperture choice. Consult your Nikon FG user manual for a comprehensive understanding of aperture values and their effects. This mode empowers you to artistically shape your images.
Shutter-Priority Mode (S) — User Controls Shutter Speed
Shutter-Priority Mode (S) on the Nikon FG allows you to dictate the duration the camera’s shutter remains open, controlling motion blur and freezing action. Selecting a fast shutter speed (e.g., 1/500s) effectively freezes fast-moving subjects, preventing blur. Conversely, a slower shutter speed (e.g., 1/30s) introduces motion blur, conveying a sense of movement or creating artistic effects like light trails.
The Nikon FG automatically adjusts the aperture to achieve correct exposure based on your chosen shutter speed. This mode is invaluable for sports photography, capturing waterfalls with a silky smooth effect, or any situation where controlling motion is paramount. Refer to your Nikon FG user manual for detailed guidance on shutter speed selection and its impact on image quality. Mastering this mode unlocks dynamic photographic possibilities.
Manual Mode (M) ― Full User Control
Manual Mode (M) on the Nikon FG grants the photographer complete authority over both aperture and shutter speed, demanding a thorough understanding of the exposure triangle. This mode bypasses the camera’s automatic systems, requiring you to independently determine the optimal settings for desired exposure. It’s ideal for challenging lighting conditions where the camera’s metering might be misled, or when a specific creative effect is desired.
Utilizing the Nikon FG’s built-in light meter, you can manually adjust aperture and shutter speed until the meter indicates correct exposure. This mode fosters a deeper connection with the photographic process, enhancing your technical skills. Consult your Nikon FG user manual for detailed instructions on using the light meter and achieving precise exposure control in Manual Mode. It’s a pathway to truly personalized imagery.
Focusing and Metering
Explore the Nikon FG’s autofocus system and metering modes for accurate image capture. Understand viewfinder usage for precise focusing and optimal exposure settings.
Autofocus System Overview
The Nikon FG features a sophisticated autofocus (AF) system designed to deliver sharp, precisely focused images. While not as advanced as modern systems, the FG’s AF is reliable and effective for a variety of shooting situations. Understanding its operation is key to maximizing your photographic results.
The camera utilizes a contrast-detection autofocus method. This means the camera analyzes the contrast within the viewfinder to determine when optimal focus is achieved. The FG offers selectable AF points, allowing you to prioritize focus on specific areas of the frame. This is particularly useful when photographing subjects that aren’t centered.
To engage autofocus, typically you’ll need to half-press the shutter release button. The camera will then activate the AF system and attempt to lock focus on the selected AF point. A confirmation light in the viewfinder indicates when focus has been achieved. Remember to consider depth of field and ensure sufficient light for optimal AF performance. Manual focus override is also available for situations where autofocus struggles.
Metering Modes Explained
The Nikon FG offers several metering modes to help you achieve accurate exposures in diverse lighting conditions. Understanding these modes is crucial for consistent results. The primary modes include center-weighted averaging and spot metering.
Center-weighted averaging prioritizes the brightness of the central area of the frame, while still considering the entire scene. This is a versatile mode suitable for many everyday shooting scenarios. Spot metering, conversely, measures the light from a very small area, typically around the active focus point. This is ideal for challenging lighting, like backlit subjects, where you need precise control.
Selecting the appropriate mode depends on the scene. For general use, center-weighted averaging is a good starting point. For tricky situations, spot metering allows you to expose for a specific element, ensuring it’s correctly lit, even if the surrounding areas are much brighter or darker. Experiment to find what works best for your style.
Using the Viewfinder
The Nikon FG’s viewfinder is your window to composing and focusing your shots. It displays crucial information, including focus points, exposure settings, and metering readings. Familiarize yourself with its layout for efficient operation.

Within the viewfinder, you’ll find focusing screens aiding in achieving sharp images. Pay attention to the microprism collar and split-image rangefinder in the center – these assist with precise manual focusing. The viewfinder also shows the selected exposure mode (P, A, S, or M) and other relevant settings.
Understanding the viewfinder’s indicators is key. The LED indicators display exposure information in Program mode, while in other modes, they show over or under-exposure warnings. Regularly checking the viewfinder ensures accurate composition and proper exposure before pressing the shutter release.
Film Handling and Rewinding
Learn proper film loading and rewinding techniques for the Nikon FG, ensuring your photos aren’t ruined. Compatibility includes various film types.
Loading Film into the Nikon FG
Begin by opening the camera’s back cover, located on the side. Insert the film canister into the film chamber, ensuring it seats correctly. Gently pull the film leader across the camera body towards the take-up spool. Confirm the film leader is properly engaged with the teeth of the take-up spool; this is crucial for correct winding.
Advance the film winding lever a couple of times, observing that the film is advancing smoothly onto the take-up spool. If it doesn’t, carefully re-engage the film leader. Close the camera back securely. The Nikon FG automatically resets the frame counter to ‘S’ when the back is opened, advancing to ‘1’ with the first shutter release. Always double-check that the film is advancing before taking important shots, preventing wasted frames. Proper loading ensures optimal performance and image quality.
Rewinding Film Correctly
To rewind the film, locate the film rewind knob on the top of the Nikon FG. First, press the film release button on the bottom of the camera. This disengages the film from the take-up spool, allowing it to be rewound. Then, lift the rewind knob and turn it in the direction indicated by the arrow – typically clockwise.
Apply gentle, consistent pressure while rewinding. You’ll feel resistance initially, which will lessen as the film is fully rewound into the canister. Continue rewinding until you feel a distinct release, indicating the film leader has fully entered the canister. Once fully rewound, open the camera back and remove the film canister. Proper rewinding prevents light leaks and ensures your images are preserved. Avoid forcing the rewind knob, as this could damage the mechanism.
Film Type Compatibility
The Nikon FG is designed for use with 35mm film cartridges. It readily accommodates a wide range of film types, including black and white, color negative, and color slide (transparency) films. ISO speeds ranging from 25 to 3200 are generally supported, though optimal results depend on lighting conditions and film characteristics.
While modern films are universally compatible, older or less common film formats may present issues. It’s best to stick with standard 35mm cartridges from reputable manufacturers. The camera doesn’t have specific limitations regarding film chemistry, allowing for flexibility in development processes; Ensure the film is loaded correctly to avoid light leaks or mechanical failures. Experiment with different film stocks to achieve varied aesthetic effects.

Advanced Features and Settings
Explore depth of field preview, the self-timer, and multiple exposure capabilities to unlock the Nikon FG’s full creative potential for unique photography.
Depth of Field Preview
The Nikon FG offers a valuable Depth of Field Preview function, allowing photographers to visually assess the extent of focus before capturing the image. This feature is particularly useful when working with smaller apertures, where determining the in-focus area can be challenging simply by estimating.
To activate the Depth of Field Preview, simply depress the button typically located near the lens mount on the camera body. While holding this button, the aperture will stop down to the selected f-stop, simulating the actual depth of field that will be recorded in the final photograph.
Looking through the viewfinder, you can then observe which elements of the scene will appear sharp and which will be blurred. Releasing the button returns the viewfinder to its brightest state. Remember that the viewfinder image will become darker when the aperture is stopped down, so consider this when composing your shot. Utilizing this preview ensures your creative vision is accurately translated into the final image, maximizing control over focus and artistic expression.
Self-Timer Function
The Nikon FG incorporates a convenient self-timer function, ideal for situations where you want to be included in the photograph or need to minimize camera shake during long exposures. This feature introduces a deliberate delay between pressing the shutter release and the actual exposure, giving you time to position yourself within the frame.
To activate the self-timer, locate the self-timer lever, usually positioned on the left side of the camera’s top plate. Move the lever to the “T” position. The shutter release button will now become active as the self-timer. Pressing the shutter release initiates a countdown, typically indicated by a blinking LED.
The standard delay is around 10 seconds, providing ample time. To cancel the self-timer before the exposure, simply return the lever to its original position. This function is also beneficial for macro photography, reducing vibrations that can affect image sharpness. Remember to compose your shot carefully before activating the timer!
Multiple Exposure Capability
The Nikon FG allows for creative multiple exposures, enabling you to combine two or more images onto a single frame of film. This technique opens up a world of artistic possibilities, from creating surreal effects to layering textures and forms. To initiate multiple exposure mode, you’ll typically need to engage a specific setting on the camera, often involving the rewind knob or a dedicated switch.
Once activated, each press of the shutter release will expose a new frame onto the same section of film, building up the image progressively; It’s crucial to understand that the camera won’t automatically advance the film after each exposure in this mode.
Careful metering is essential to avoid overexposure. Consider underexposing each individual shot to compensate for the cumulative effect. To return to normal single-frame operation, disengage the multiple exposure setting. Experiment with different combinations to unlock unique visual results!
Maintenance and Troubleshooting
Ensure optimal Nikon FG performance through regular cleaning and address common issues. Seek professional service and repair when needed for lasting reliability.
Cleaning the Nikon FG
Maintaining your Nikon FG requires gentle cleaning to preserve its functionality and appearance. Begin by using a soft, dry cloth to wipe down the camera body, removing dust and fingerprints. For the lens, employ a dedicated lens cleaning cloth and solution – avoid harsh chemicals or abrasive materials.
Pay close attention to the viewfinder eyepiece and film chamber; carefully dust these areas with a blower brush. If stubborn dirt persists, lightly dampen a cloth with distilled water. Never apply liquid directly onto the camera. Regularly inspect and clean the battery compartment to prevent corrosion.
Avoid disassembling the camera for cleaning, as this could void any warranty and potentially damage internal components. Consistent, gentle cleaning will ensure your Nikon FG remains in excellent condition for years to come, allowing you to continue capturing beautiful photographs.
Common Issues and Solutions
Encountering problems with your Nikon FG is common, but many are easily resolved. A frequent issue is film not advancing; check the battery and ensure the film is loaded correctly. If the shutter doesn’t fire, verify the mode dial isn’t set to ‘B’ or ‘L’. Light leaks can occur due to a faulty door seal – inspect and replace if necessary.
Metering inaccuracies might stem from weak batteries or a dirty viewfinder. Ensure proper battery installation and clean the viewfinder window. If the autofocus fails, try resetting the camera or consulting a repair technician. Remember, attempting complex repairs yourself could cause further damage.
For persistent issues, seeking professional Nikon FG service and repair is recommended. Online resources and forums can also provide valuable troubleshooting tips and support from fellow enthusiasts. Prioritize preventative maintenance to minimize potential problems.
Nikon FG Service and Repair Information
For complex issues beyond basic troubleshooting, professional Nikon FG service is crucial. While DIY repairs are possible, they risk further damage to this classic camera. Locate authorized Nikon repair centers through their official website or reputable camera repair shops specializing in vintage equipment.
Expect repair costs to vary depending on the problem’s severity – from simple cleaning and lubrication to more extensive component replacements. Obtaining a repair estimate beforehand is highly recommended. Online forums dedicated to the Nikon FG often list recommended technicians and their associated costs.
Consider the camera’s age and value when deciding whether to pursue repairs. Sometimes, the cost may exceed the camera’s worth. However, for enthusiasts, restoring a beloved Nikon FG is often a worthwhile investment. Always prioritize qualified technicians for optimal results.